
SA63 Light Conversion

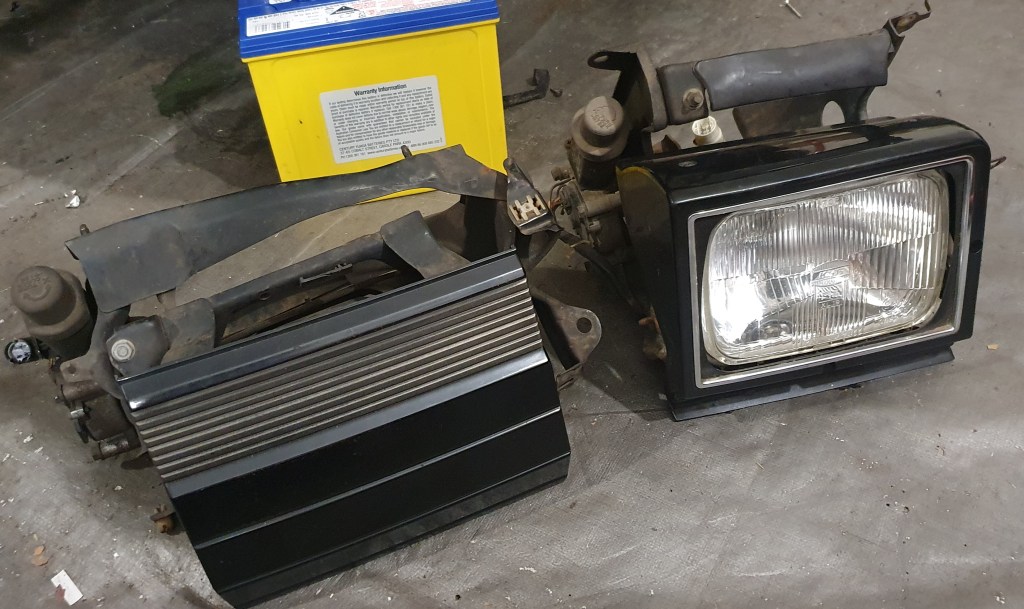
While the chassis is pulled apart to do the rust repair, I decided to swap out the RA60 front lights and replace them with the pop ups from the white car. Due to the different shape of the pop up lights, some of the body panels have to also be changed, such as the bonnet, front bumper and grill.

One of the parts that needs to be changed is the indicator stalk. On the old indicator, the lights came up on the second position. With the pop ups, the lights come up on the third position with the tail lights. It is possible to modify the indicator wiring to fix this, but the washer button on the old one was broken so I decided to change it.
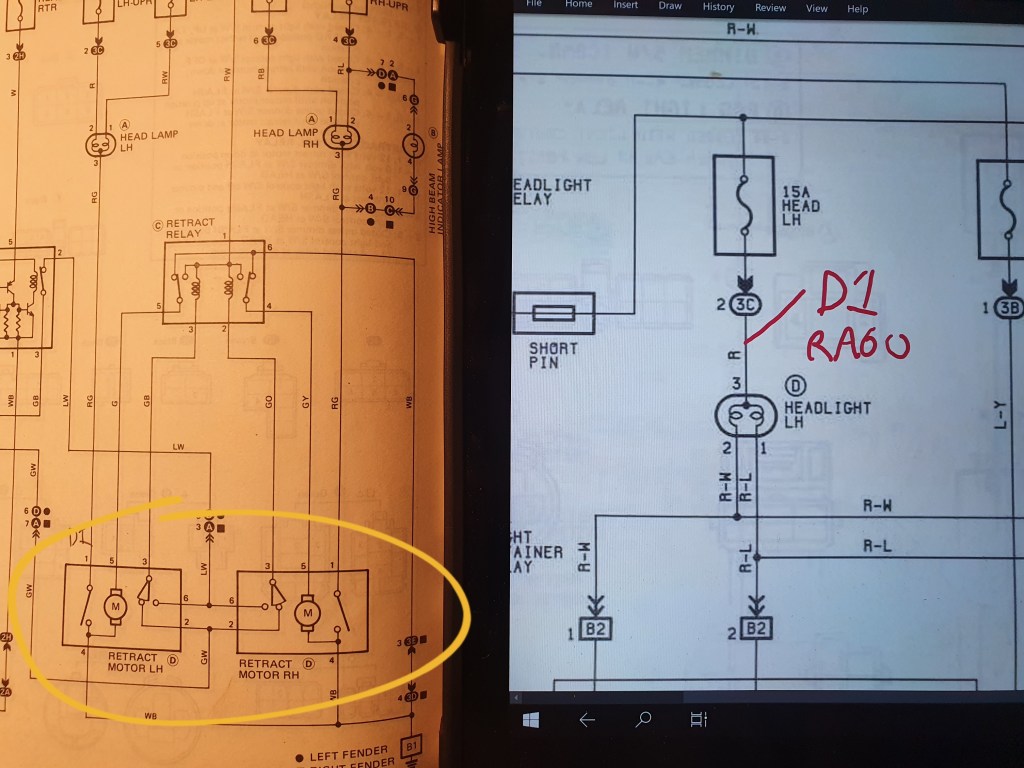
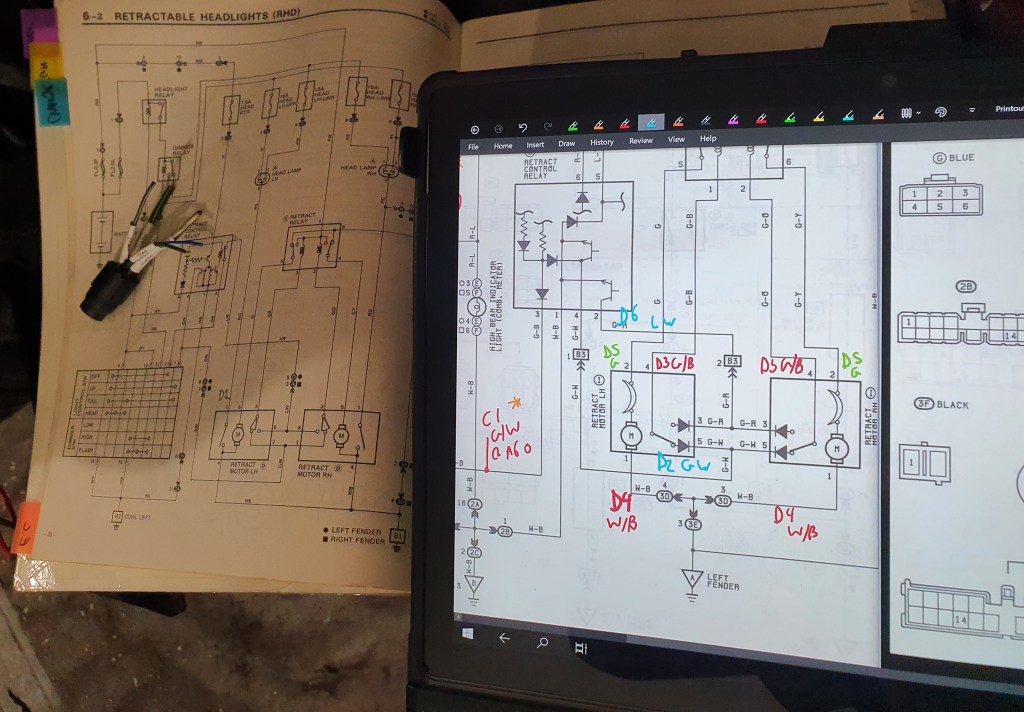
The head lamps are also wired up differently. On the RA60 the headlamp circuit is closed by the retract motor in the lights. With the SA63 headlamps the bulbs are low side drive, a limit switch inside the headlamp closes the circuit when the light is in the up position. To solve this issue pin three on the bulb is now earthed on the chassis.
Even though the cars are only two years apart in age, there are a lot of differences between the two types of head lamps. I had to splice in the connectors from the new headlamps and parker bulbs, also the pin outs and wire colours are different. The function of the lights is basically the same, but the connector pins had to be changed to the following:
| Old Pin # | New Pin # | Function |
| 1 | N/A | Headlight -ve (no longer used) |
| 2 | 5 | Motor limit switch (up) |
| 3 | 4 | Limit switch common |
| 4 | 1 | Motor negative |
| 5 | 2 | Motor positive |
| 6 | 3 | Motor limit switch (down) |
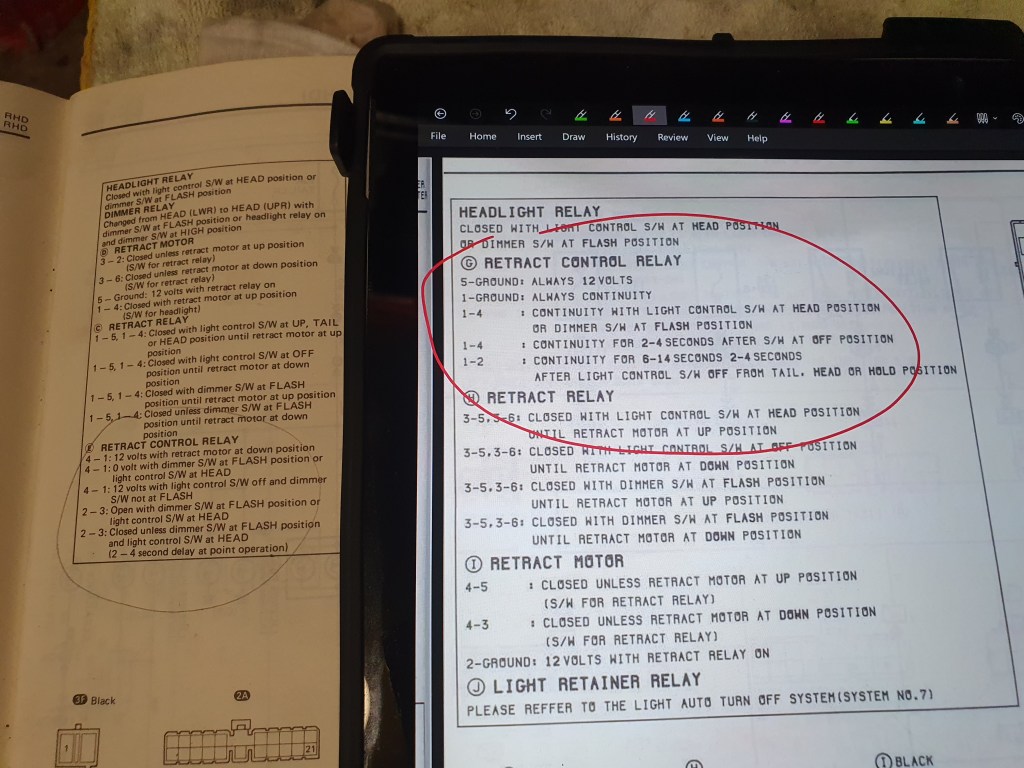
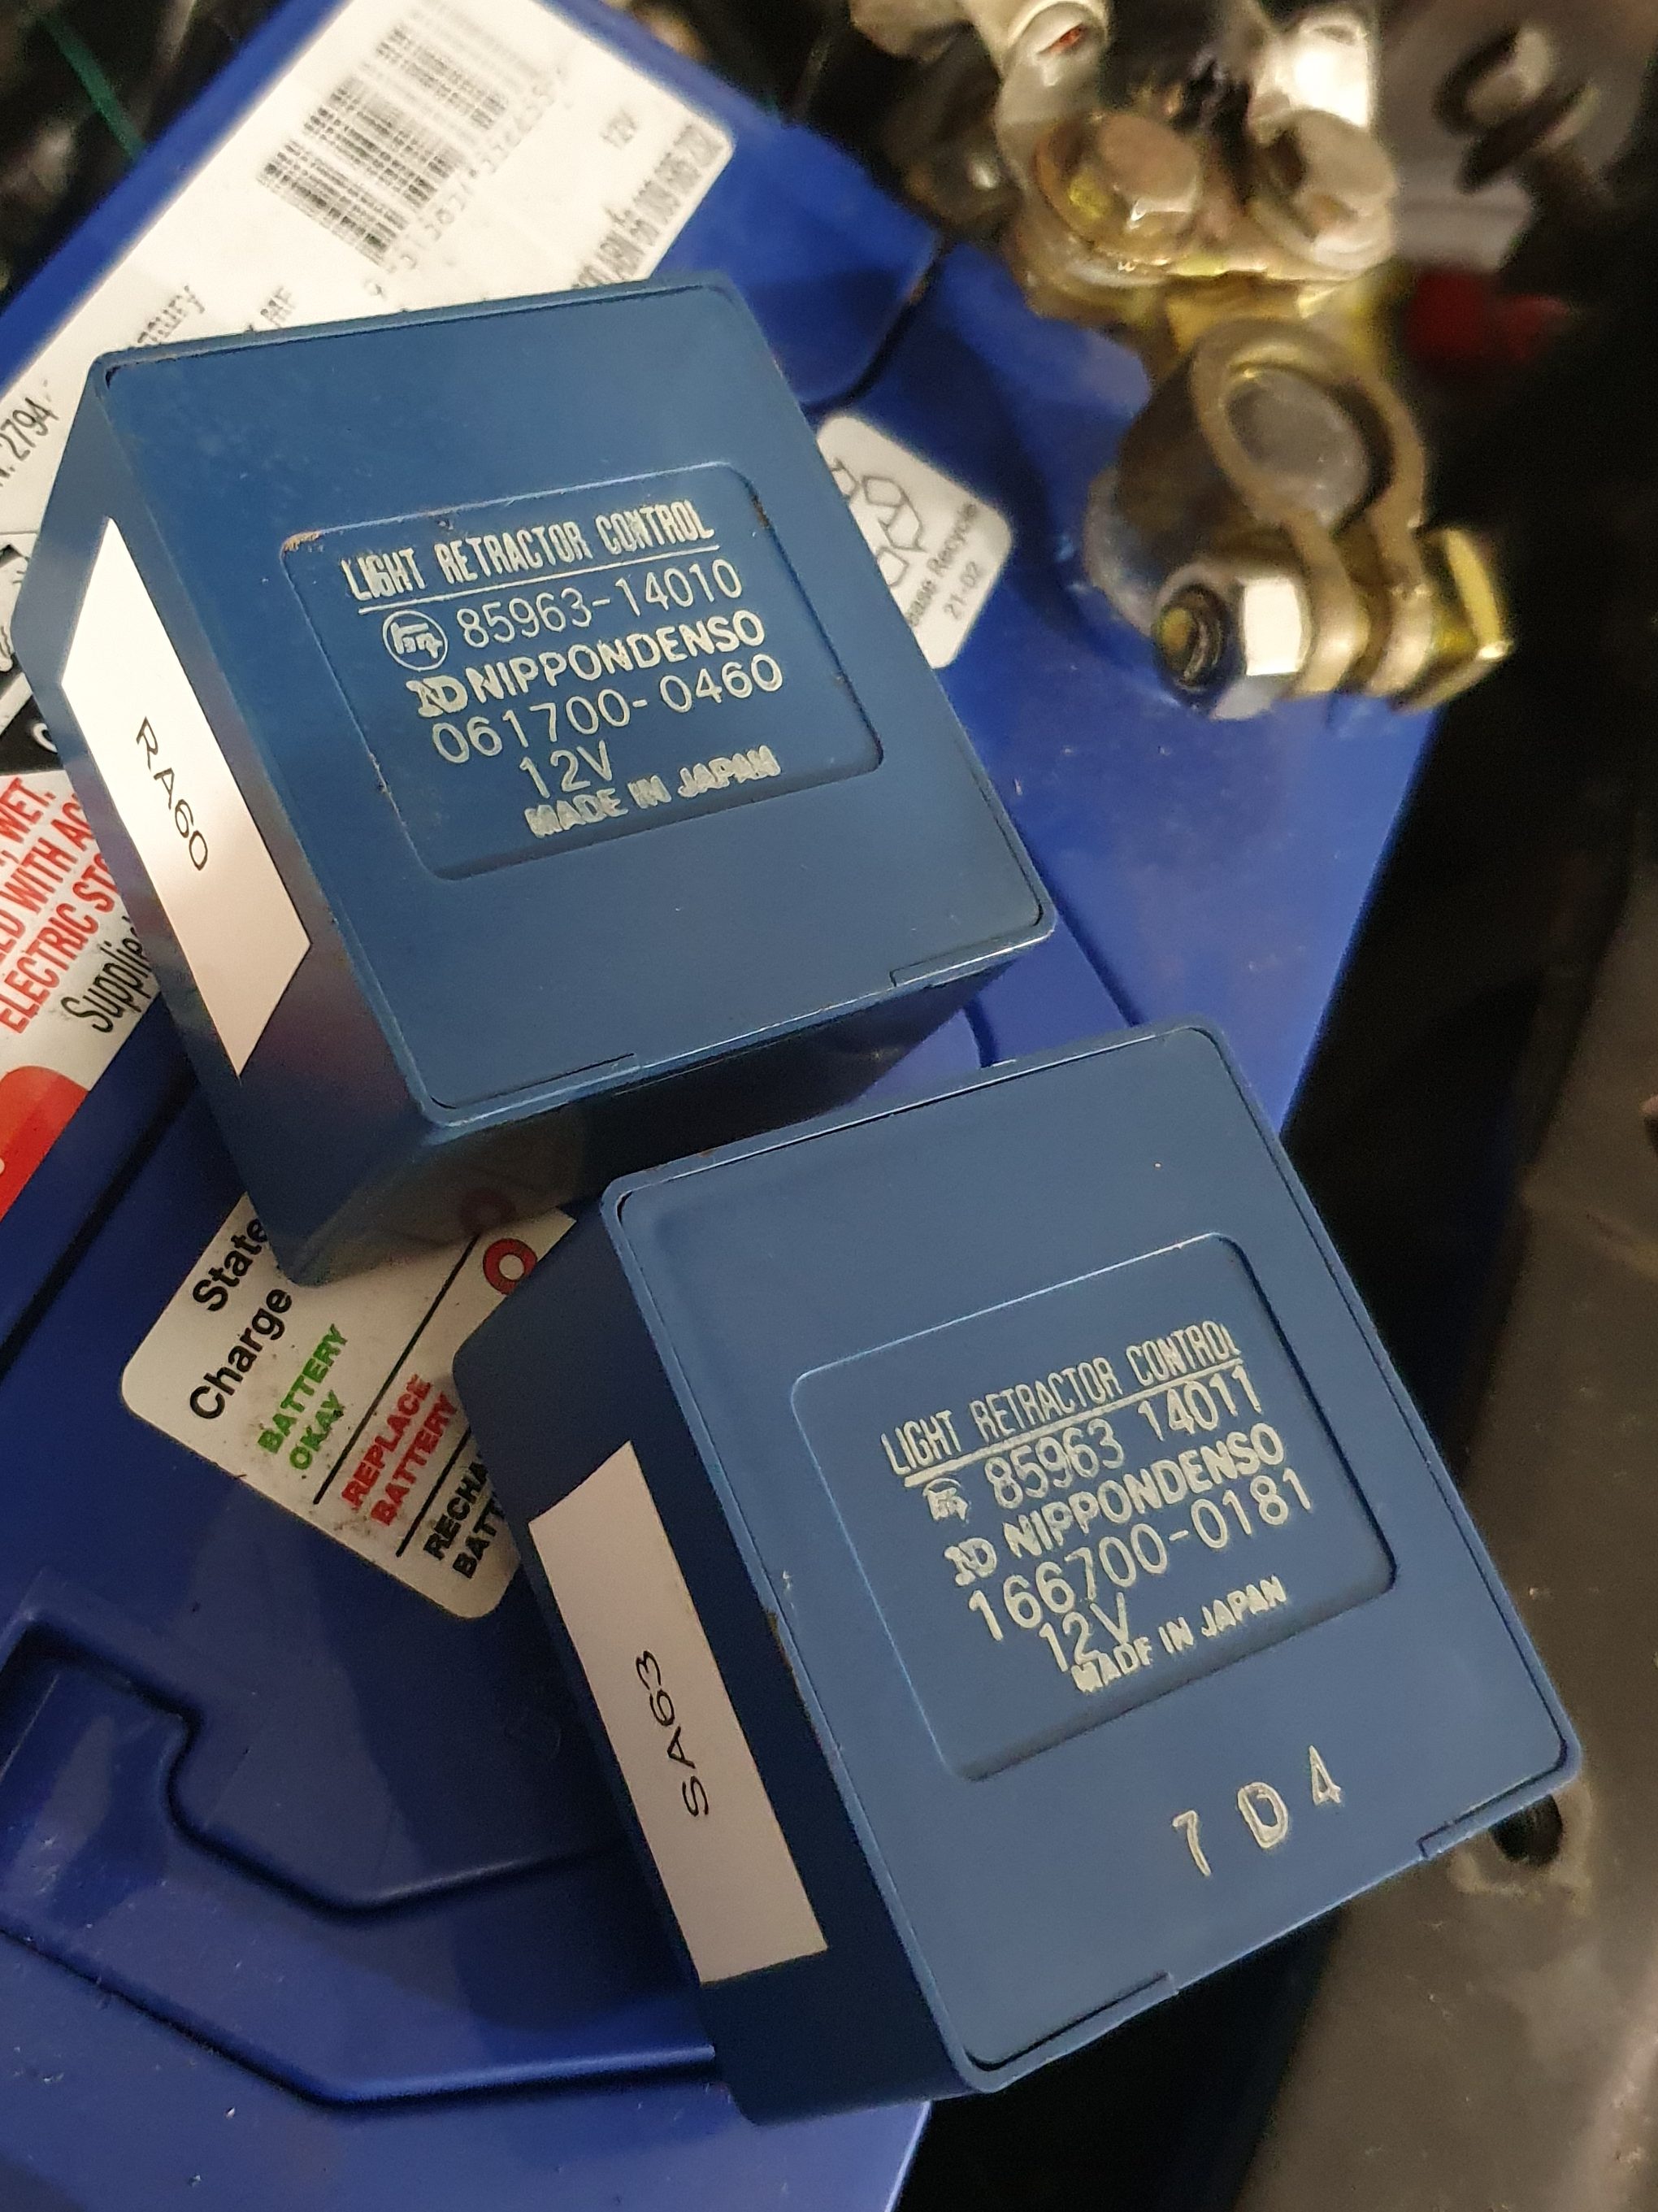
Another difference between the headlamp circuits is the retract control relay. This relay sits up under the dash and controls the lights correspinding to the inputs on the combination switch. The relay for the pop out style RA60 lights is different internally compared to the pop up lights. The pop ups will not work properly with this relay. The correct relay is 166700-0181 which should be the same for SA63, RA65 and MA61 Celica Supras.
To do this light conversion you will need the following parts:
- Headlights and corner lights
- Front bumper
- Front grille
- Front grill support
- Indicator stalk
- Light retractor control module
- Bonnet
