Miata Radiator Upgrade

While testing the engine I found that the radiator was leaking coolant from the core. I have a spare radiator but the top inlet is on the incorrect side. I had considered swapping the top tanks, but upon disassembling the radiators I found that the seals had deteriorated, and could not get replacements.
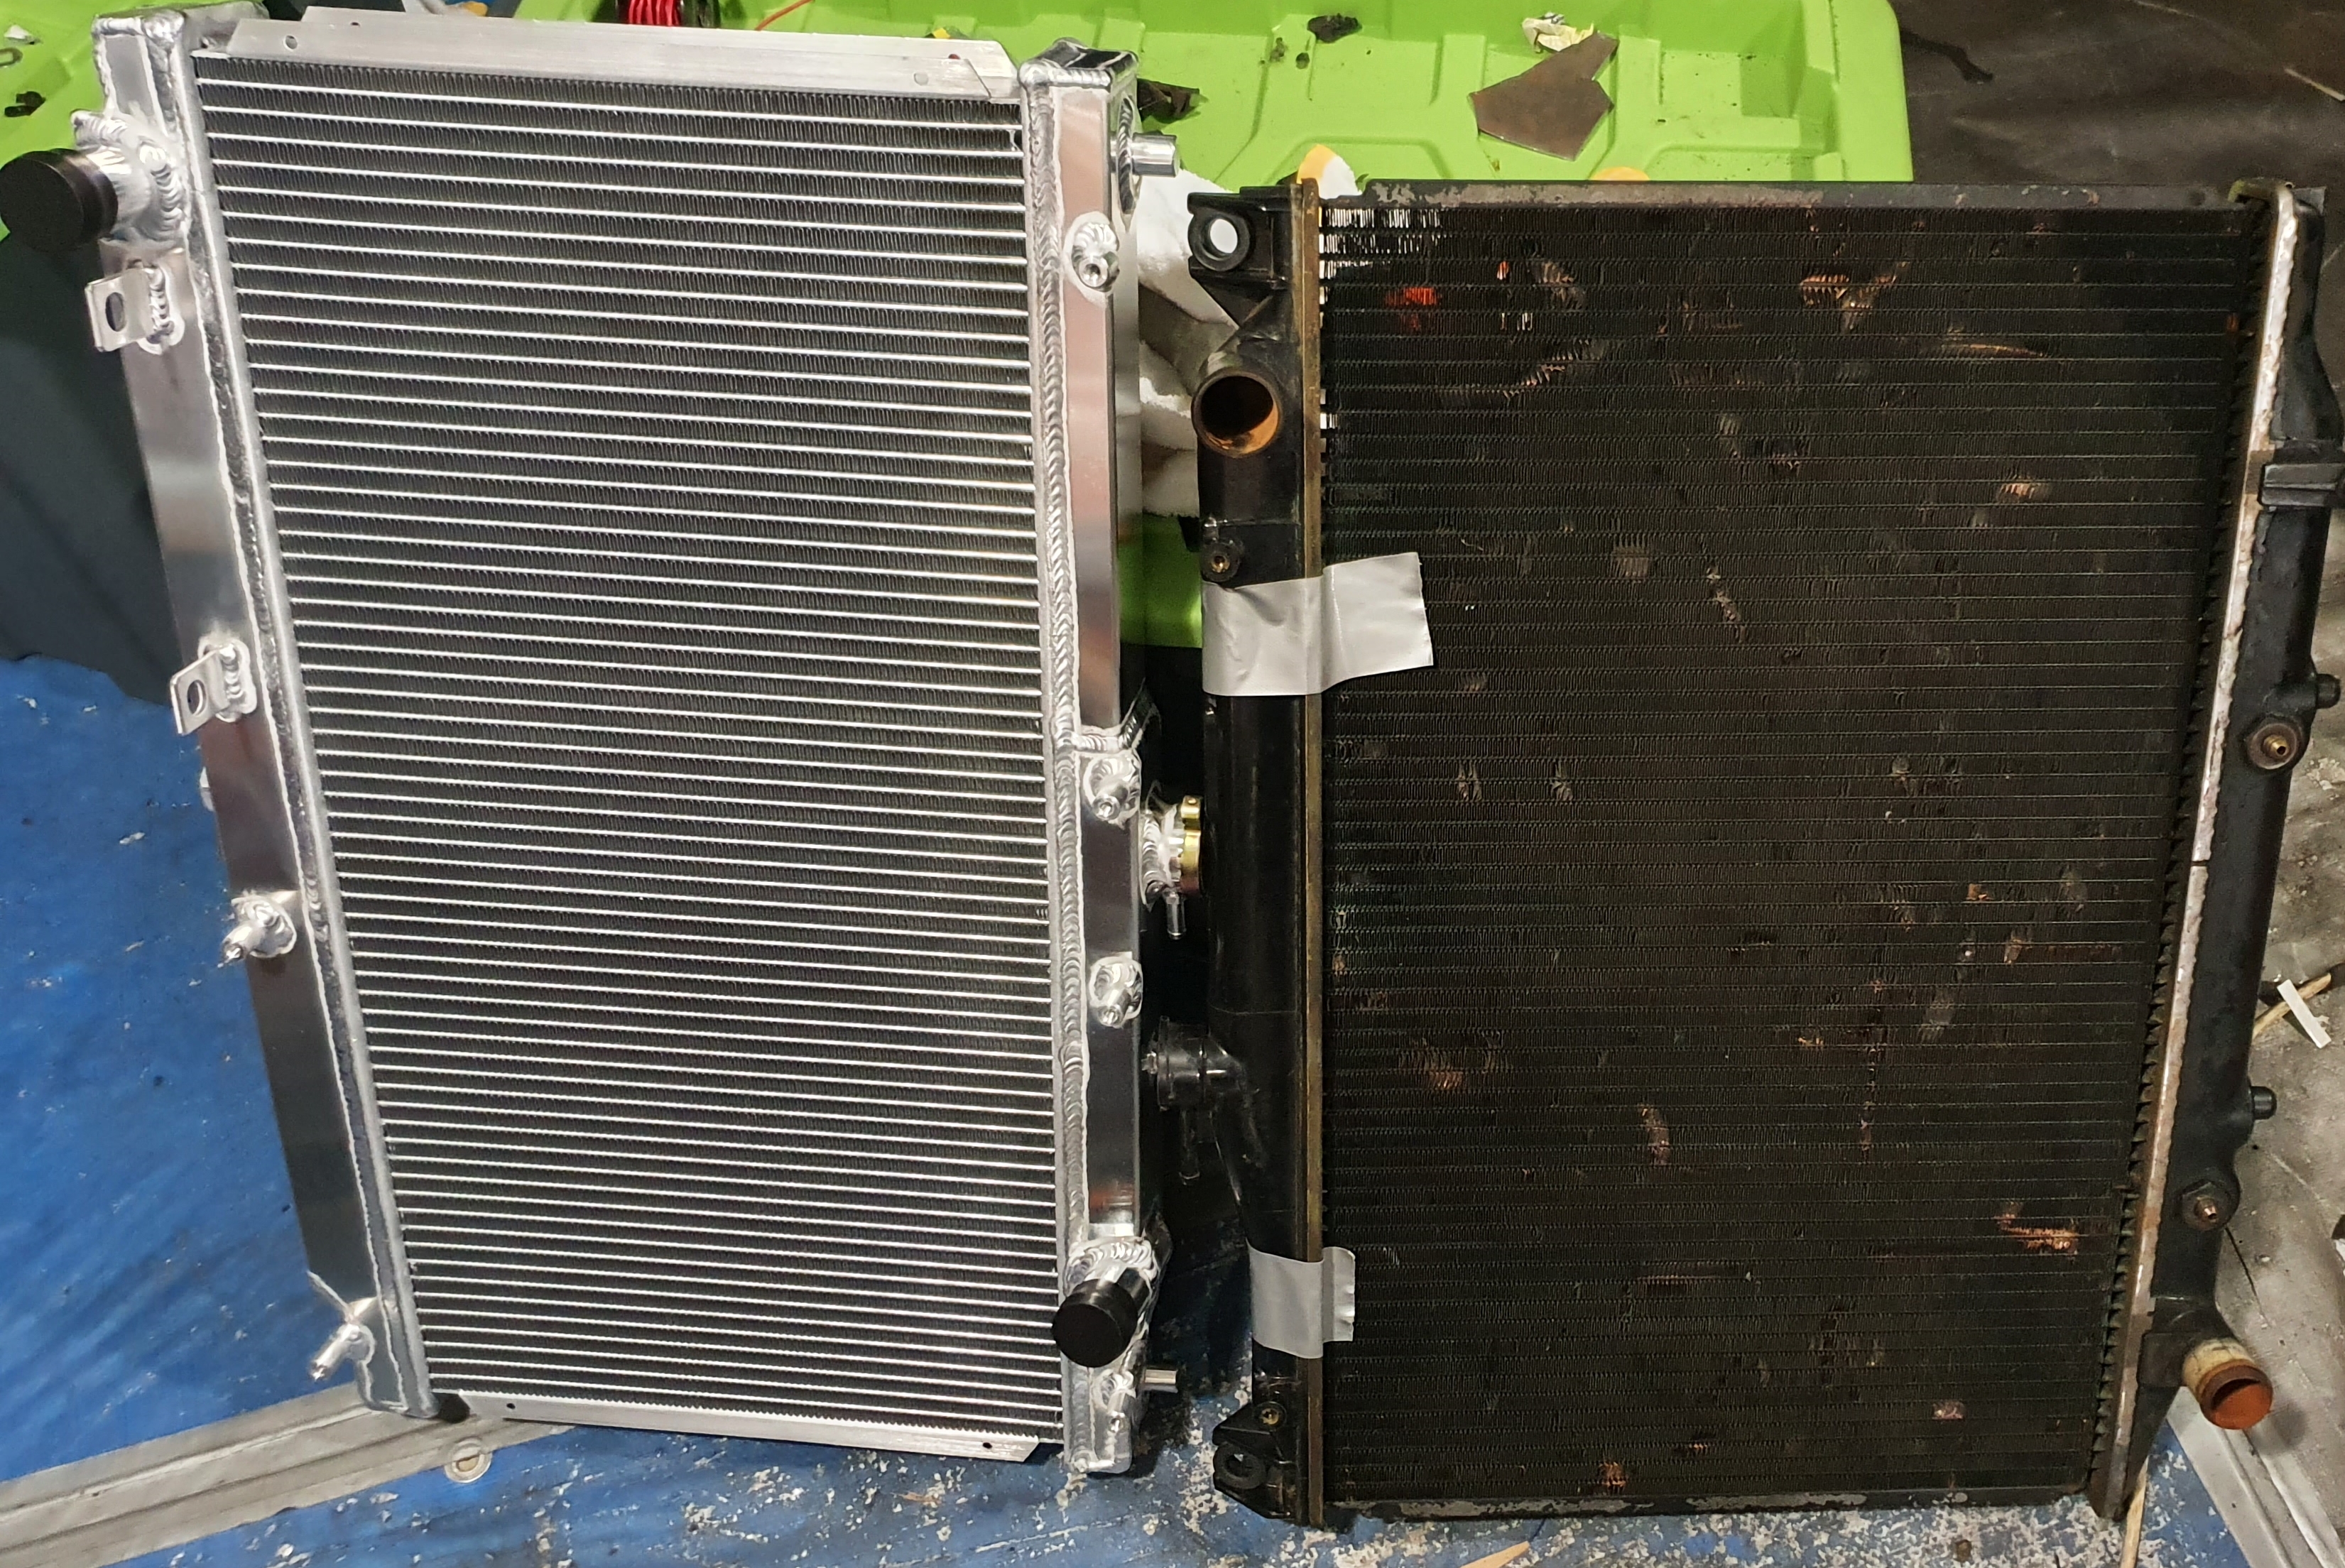
I decided to get a more modern radiator and retrofit it. After some searching i found an NB MX5/Miata aluminium radiator. The NB radiator is the same width but almost double the thickness of the original. It is shorter by approximately 50mm. The inlet/outlet size is the same as the RA60 radiator, 38mm, and the inlet is on the same side.
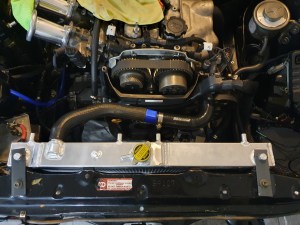
Radiator Test Fit
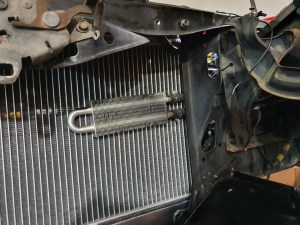
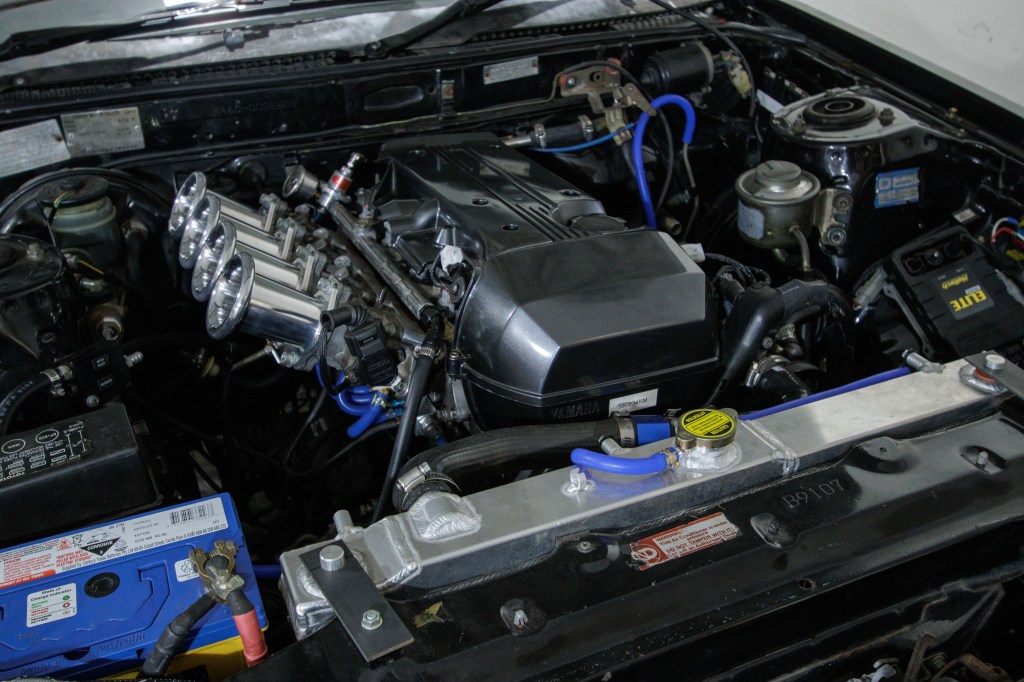
When I test fitted the radiator I found that the inlet and outlet ports were in almost the same spot as the original radiator. The hoses line up, but do need to be shortened. The bottom of the NB radiator sits higher, so the original lower mounts on the radiator support will not work, new mounts need to be fabricated. There is enough of a gap between the front support and the radiator core to mount the power steering cooler. The outlet for the overflow bottle is facing the wrong way but that’s not a big issue.
Lower Radiator Mounts
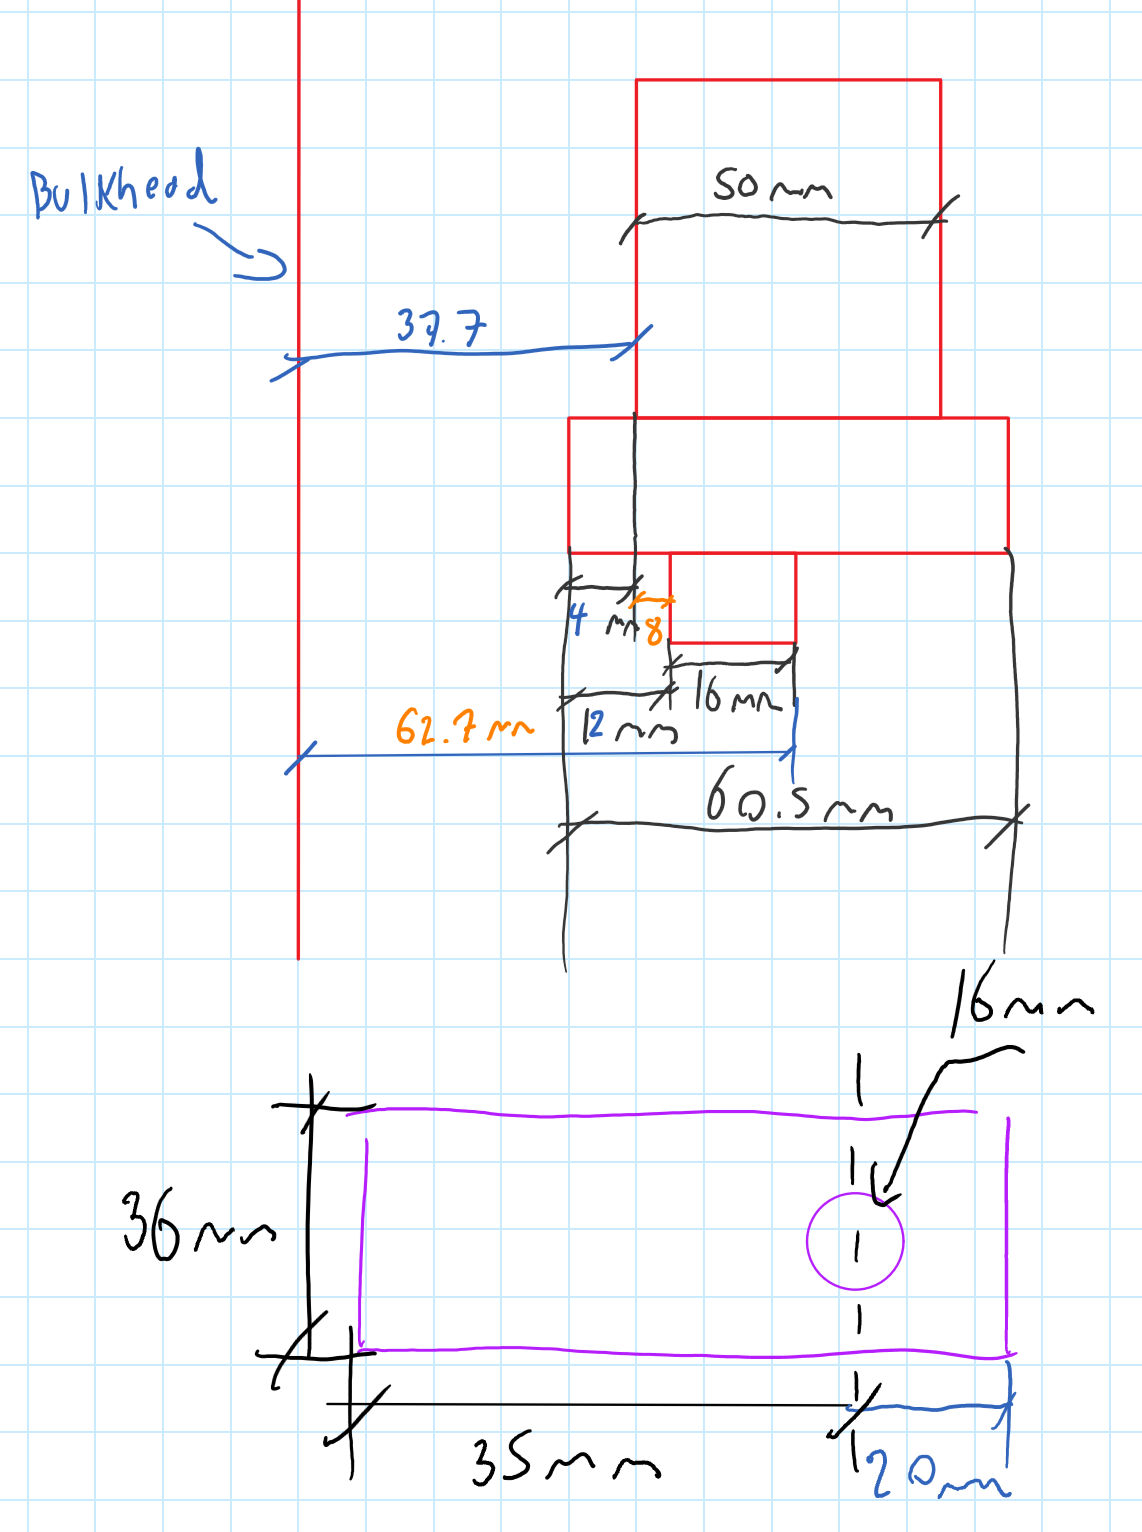


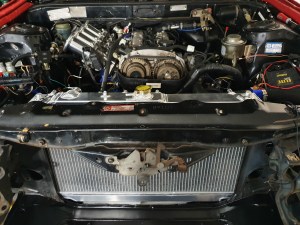
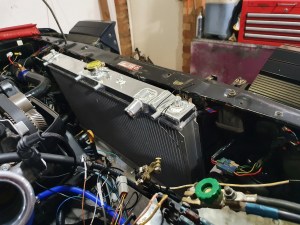
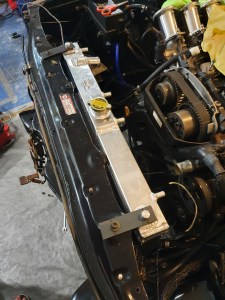
For the lower mounts I am going to make brackets from some U channel steel that the radiator mounting pegs can sit in. These will be welded to the front radiator support. I did some measurements and worked out the required dimensions for the bracket. Test fitted and welded the brackets. there is good clearance all around, rubber washers are between the radiator and bracket for damping.
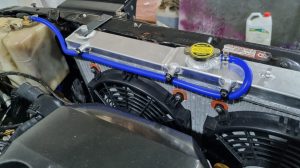
Top Bracket

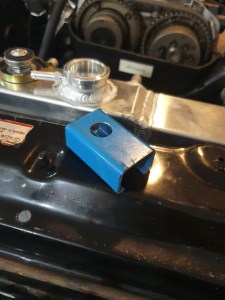
For the top bracket I used some flat bar that sits around the posts on the top of the radiator with rubber washers, and bolts to the radiator support. They can easy be unbolted if the radiator needs to be removed.
Cooling Fans & Hoses
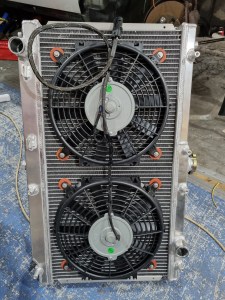

I am using the same twin 12″ thermofans from the old radiator. There is high performance fan + shroud kits for these NB radiators, but ill see how engine temps go with these fans first. I had to cut ~20-25mm off the top and bottom hoses, they now both line up properly. For the overflow bottle I used some 5/16 high temperature silicon hose , secured to the top of the radiator with P clips. I have also test fitted the AC condensor, there is enough clearance for it to to be mounted, and there is space between the radiator and chassis rails for the AC compressor lines.